Friday, April 6, 2012

Random Items made end of 2011/ 2012 so far!

So I have many other things that are catergorized if you click on the months or 2011 where there are 16 different post to the right anywhere from Jewlery, Fashion Totes & Much more.  However on this new post I am just going to post random Items I have made in end of 2011 /2012.  Let me know what you think!!! You can leave comments, Question or even just email me at nomaam72@yahoo.com.  Also another really neat blog to check out is http://acreativeprincess.blogspot.com/!  Me and her have a lot of crafty ideas in common!!!

Fashion Tote with matching detachable clutch
Multi-Colored Washer Necklace

Flower Chain Ribbon Necklace

Flower Button Stretch Ring

Be Yourself Beaded Charm Bracelet. Other Charms can be added!

Button Necklace

Fashion Tote!
Multi-Pattern Wood Handle Fashion Bag!

Cute Bucket Hat with Flower!
Bucket Hat with matching Hobo Bag!
Lego Cross Necklaces with sport charms!

Team glass bead cross bracelets!


Button Boutonniere

Button Necklace

Heart Wired " I LOVE YOU" Necklace

Coach Image Necklaces

Coach Image Shoe Clips

Cuff Tie Bracelet

Dr. Seuss Book Image Bracelet

Multi-Colored Washer Necklace

Beaded Fabric Necklace


Family Tree Birthstone Charm Necklace

Washer Necklace

Button Flower Stretch Rings

Unique Wired I Love you necklace

Frog Button Boutonniere

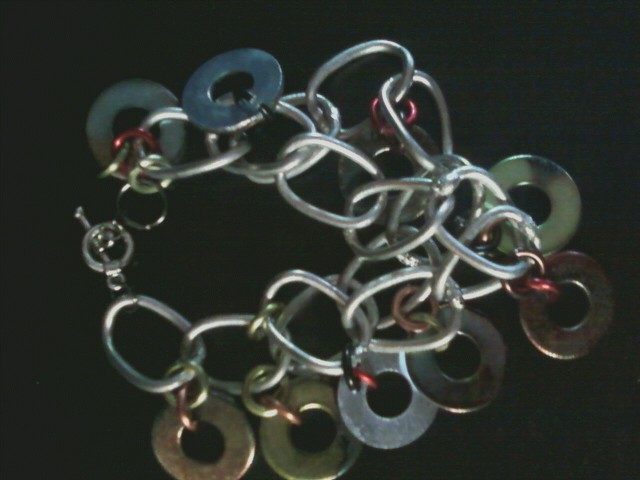
Multi-Colored Washer Bracelet
Fashion Tote


Team Stocking.  Can come in other Teams

Washer Beaded Necklace
Rosette Stocking Cap!
 Fashion Tote
 Silver Flower Mesh Bracelet
 Team Flower Coin Purse
 Wired Heart I love you Necklace
 Team Charm Bracelet
 Team Fashion Tote

Tie Ribbon Toddler Dress
 Teacher Boutonniere
 Teacher Wreath
 Team Tote
Cardinal Bags!


 Black Pendant Wired Necklace
 Volleyball Charm Bracelet
 Fabric Beaded Necklace
 Team Ornament
 Heart wired Necklace
 Multi-Colored Flower Washer Necklace
 Rug Fashion Tote!
 Teacher Wreath
Team Wreath


Saturday, March 10, 2012

Button Washer Necklace Tutorial

Supplies you will need to make this Necklace:
1.  Floral Wire.  You can purchase at the $1 store.
2. Button Color of choice.
3. 1 larger Washer.  Want to say it is a 1/2.
4. Med. Size Jump Rings.  I bought mine at Joann Fabrics.
5. A clasp to hook it together.  Again bought at Joann Fabrics.

Now how to make the necklace:
1.  Take the Floral Wire and estimate around your neck for sizing.  Then cut just a little larger then you want it.
2 You will take your Washer and the button you want on top of it for your center piece.  Then you will take your piece of floral wire you cut,  fold it in half so you know your center point.  Then pull wire under and through the top & back down through the bottom of the button and washer and pull it through tightly and pull outwards.  Look at the next couple pic. below.
3.  Now you will take your next button for one of the sides and go under & over and pull again tightly so they almost overlap each other.  I alternate sides and colors.  You will see by looking at picture. 
4.  Pretty simple once you get it going.  When you are complete with buttons, you will now loop and twist the ends of you wire so you can connect the jump rings and the clasp.

Thanks for stopping and checking out this tutorial.  Hope you like it!!!


Fabric Beaded Flower Necklace!  Got this idea off of a tutorial from

Multi-Pattern Flower Tie Fashion Tote!


Tuesday, February 21, 2012

Dr. Seuss Charm Book image Bracelet

Tutorial on Dr. Seuss Charm book image bracelet for under $5.00.

Tools Needed:
1. Dr. Seuss Images.  Order images from Etsy.com for $3.50.
2.  Old Gift Cards or Hotel Keys
3.  Charm Bracelet Chain.  Bought at Joann Fabrics for $1.29.
4. Sandpaper
5. Boxcutter
6. Modgpodge
7. Paper Glaze/ Bought at Michaels
8. Rings for the charms to attach to charm bracelet
9. A Pin
10. Scissors
Forgot to add picture of boxcutter! LOL

1.  I order the 1inch scrabble images from Etsy.com.  Just go to Etsy and type this into search.  They cost me $3.50 for the images.   I saw this bracelet for $37.50 on Etsy!  Why do that when you can make for less then $5.00?  LOL!  When you pay for images, they will be emailed to you with in 24 hours.
2.  Once images were downloaded and printed, i cut the images out that I was going to use.
3. Then instead of using scrabble pieces, I cut up old Giftcards & Hotel Keys the size of images, just by tracing them.
4.  Once cut, I then took a box cutter and put the cutter where I wanted to put the hold for the rings and pushed down and turned the giftcard in a circle to make the hole.
5.Once complete, I used a total of 21 images, so 21 pieces of giftcard.  I then took the first image and placed onto 1 inch gift card piece and took a pin and poked through the image to match hold on giftcard.  Also trimmed up giftcard if needed to completely match up with image. 
6.  So now before attaching image, I used sandpaper to smooth up the images of the giftcard pieces for each one.
7.  Now once that is complete, you will begin putting the images on using modgepode both underneath and on top of image.  Once those are all dry you will do the same to the other side.  I put the the book image on oneside and and picture image on the other.
8.  Now once that is complete you will use paper glaze on each one to give it the 3D look.  You can use the modge Podge stuff to, i just used the paper glaze from Michaels.
9.  Then again after dry you will do other side!  Once complete I stuck a pin through the tine hole I had made earlier so I could then put the rings through.
10.  I bought the charm bracelet at Joann Fabric for $1.29.  Super cute and then added the charms to the bracelet.  You can trim up any areas if needed and will not hurt the charms.

I am going to give this to my son's Teacher on March 2 for Dr. Seuss's Birthday.  I also went to Target, because they have the books this week 2/$20 and i found printoffs on Pinterest.  I am going to make a gift basket for the kids to celebrate Dr. Seuss Day!


Super Cute Fashion Tote made from fabric scraps!

Saturday, January 21, 2012

Valentine's Day Gifts!

IF YOU ARE LOOKING FOR THE LOCKING RING TUTORIAL & FLOWER WASHER NECKLACE TUTORIAL, THEY ARE BELOW THE VALENTINE'S DAY JEWELERY!

Pretty in Pink "I Love You" Triple Wired Heart Necklace!

Pretty in Pink Follow your Heart/I love you Necklace!
Wired Black Pendant!


CHARM HEART 2 HEART NECKLACE!
LOVE DOUBLE WASHER NECKLACE!
LOVE FILLED WASHER NECKLACE!
Flower Washer Necklace!
HEART 2HEART NECKLACE!
HEART 2 HEART NECKLACE!
LOVE BEADED WASHER NECKLACE!
Engraved MOMMY, I LOVE YOU TO THE MOON & BACK WITH CHILD BIRTHSTONES!
SWIRL WASHER NECKLACE!
SWIRL WASHER RING!
MULTI-COLORED WIRED HEART NECKLACE!
WIRED HEART NECKLACE!
DOUBLE LOVE WIRED HEART NECKLACE!
Wired Marble "I love you" Necklace!
Salt Dough Engraved Heart Pendant Necklace

Friday, January 6, 2012

Locking Washer Ring Tutorial!

Hello Guests!  If you are looking for the Multi-Colored Flower Washer Tutorial, it is below this Locking Washer Ring Tutorial!  Thank you for visting and hope to see you again soon!  Oh, & if you have time feel free to connect with following or leaving a comment!!
Tools you will need:
  • E-6000 or some type of metal bonding.
  • 1 Adjustable Ring Base.  Bought mine in a pack of 8 from Joann Fabrics.
  • 1 Regular Washer.  I believe this one is a small 7/8.  Should be just a tad bigger then your biggest Locking washer which is a 1/2.
  • 6 Locking Washers.  You will start with grabbing the 1/2 which will be your largest and work your way down in size each one being smaller and smaller in size with a total of 6! Bought all my Washers at ACE hardware.
  • Did not show picture, but a Q-Tip.
Now that you have everything, now it is time to have some fun!
  1. Take your 3/8 Reg. Washer and with your Q-Tip put the E-6000 around it.  Do not worry, it will not show at the end of your finished craft.
  2. Then take your 1/2 Locking washer and place on the glue.
  3. You will repeat steps with glue and the rest of the Locking washers from biggest to smallest to where it should look like you are building a peramid.
  4. Once you are done with that with the E-6000 glue the peramid you made with the washers to the Ring base.  Let dry upside down so the ring finger is upwards.
  5. When done it should look like this:

 
& if you want to be even more fancy you could use some Alchohol ink and turn it a different color!!!

Sunday, January 1, 2012

Tutorial on Multi-Colored Flower Washer Necklace!

Things you will need:
  • Silver Crafting Wire
  • Colored Alcohol Ink
  • Small sponge
  • Suede Necklace Rope
  • 1
  • 1" Washer
  • 5 Smaller Washers.  I believe 3/8 size.  5 should fit all the way around 1" washer.
Steps:
  • Lay all your washers on cardboard or thick paper. 
  • You can use any alcohol ink of your choice.  I like to use Greens, Blue, Purples and Browns. 
  • After choosing colors you will then squeeze small amounts of the alcohol ink on the washers one color at a time and then use your sponge to blot it.  The colors will mix as you blot and will form a beautiful color pattern.  You can blot as much as you want until you get the color of your liking.
  • Once complete with the coloring of your washers, then let them dry for at least a half hour.
  • After Dry lay it out to form the flower in the pattern of your liking.
  • Once you lay out and figure out the pattern you want take your large washer and the first small washer and wire it around.  Once you feel that one is tight enough cut wire and proceed to the next washer and do the same for the last few.  When you are done it should look like the flower posted above. 
  • Now cut your suede necklace rope to your liking and loop it on your flower and you now have a really awesome flower necklace!!!
There you have it!!  Hope you had as much fun making this as I did!!!  If you liked my Blog please take time to become a follower!!!!  Thanks!!  Hope to see you again soon!!