Thursday, July 26, 2012

Real Baseball Cuff Bracelet Tutorial!

Real Baseball Cuff Bracelet!


Tools you will need:
1. Baseball- Bought a 2 pk from Target
2. Box cutter
3. Images from Etsy.com
4. Mod Podge & Dementional Mod Podge
5. Baseball bead Joann fabrics
6.  Elastic band...  Joann fabric
7. Needle & thread
8.  Sewing machine
9. Piece of fabric of choice to put in the inner piece of baseball.. Not shown in pic.
10. Sewing machine  Not shown in pic
11.  Beads/ Optional
12. Glue Gun  Not shown....

How to:
1.  First take your baseball and you are going to want to cut the pattern around the seams.  Once you have taken your cutter around the shape a few times it will peal right off!  Super easy.  Did not take long at all. 
2.  Now that you have your Baseball cuff, you decide how you want to decorate.  As you can see in the pic.  I did a plain one with just the Cardinals logo and did a Cubs beaded one. 
3.  For the beaded one you take your needle and thread and the tiny little holes where the seams are on the baseball you will go in and out adding the bead through the holes!  Super easy!!!!
4.  For the logo, cut your logo out and mod podge it on where you want it and then once dry put your dementional modge podge on and let dry over night.  I cuffed mine around a bottled water  to hold the cuff while applying this and letting dry!
5.  The longest part is taking some material of choice and outlining the baseball cuff.  You need 2 pieces the same.  Now you will take and sew inside out like you would a pillow.  Make sure you put the elastic bands in on both sides before you sew.  The one side will be the band folded in half and the other will go through the hole of the baseball bead and then folded in half.  I actually used my needle and thread to to sew them like a cursive small case "L" then I pinned them on each side of the fabric before sewing together. Look below at pic... Once sewn you will reverse right side out, finish sewing.  now line up on the inside of baseball cuff and once lined up you will hot glue the fabric in. 


6.  Once completely dry you should be able to loop the one side of elastic around the ball to close....
7.  Be sure to look at pic closely to get a better idea of backside!!!
Now once done you have this Awesome Team Bracelet.. Remember you can decorate anyway you like!!!
Hope you enjoyed this Tutorial!!! 
On this one I cut the ball between the seam which let's you make 2 bracelets out of one ball..  Pull the seams out and you can take thread and sew around again to look like seams with the holes that are already made!! 

Teacher Bracelet with sewn in Name.... 


Saturday, July 21, 2012

"TEAM" Fashion Totes & Other Misc.. Team Stuff!

"TEAM" Fashion Totes!!!
St. Louis Cards. Fashion Tote!
Backside!
St. Louis Cards.  Fashion Tote!
St. Louis Cards. 2011 Champs Fashion Tote!
st. Louis Cards. Fashion Tote!
St. Louis Cards. Fashion Tote!
BackSide of above
Large St. Louis Cards.  Zipper clutch!


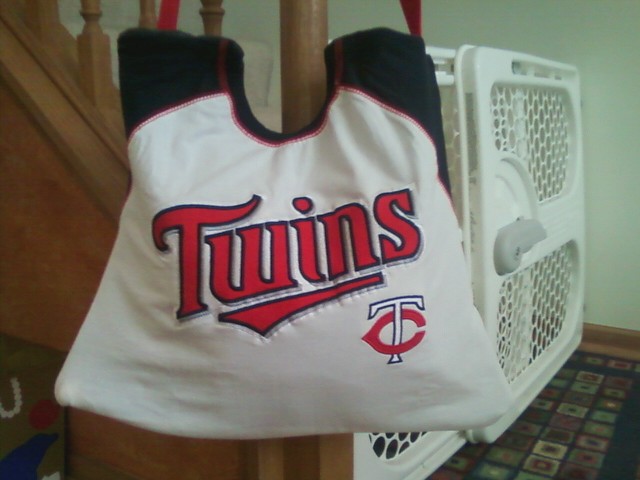
Minnesota Twins Hobo Fashion Bag!
Texas Rangers Hobo Fashion Bag!
Chicago Cubs Fashion Tote!
Greenbay Packer Fashion Tote!@
Greenbay Packer Fashion Tote!
Chicago Bears Hobo Fashion Bag!
University of Iowa Fashion Tote!

St. Louis Cards/ Packers Wine Bag!  Put Wine Glass Gift on each side and bottle of wine in middle!  Very cute and unique!
Chicao Cubs Wine Bag!
Team Cross Beaded Bracelets!

Team Charm Bracelets!


Baseball Shoe Clips!  Any Team can be put on them!!  Super cute!

Pacifier Beanie...  Easier to find Paci!!
Baseball Pacifier Clip...
Team Hair Barrettes! Any Team!

Team X-Mas Ornaments!  Any Team!
Team Wreath.. Can put up all year long! Any Team!  So Much cuter in person!


Sunday, July 1, 2012

Tutorial for Beanie Pacifier!

Tutorial for Beanie Pacifier!  (Makes it easier to find your Pacifier!)
Tools you will need:
1. Fabric of choice.
2. Any decoration you may want.  Example I put the "A" for my Nephew Alexander....
3.  Sewing machine
4. Batting to fill the beanie.
5. Pacifier ( I used the Green "AVENT" Soothie)
6. Hole puncher
7. Ribbon...  I used Baseball Ribbon

How to make:
1.  Cut 2 pieces of fabric same size.  You can make as big or little as you want.  I cut 6 inches in length and about 2.5 in width.
2.  After boiling my pacifier I took my hole puncher and on the handle lip part I hole punched 3 punches across the middle to slide my ribbon through.
On this paticular pic.  I messed up the hole punches.  You will want to make them more in the middle so you have more thickness on the bottom.

3.  Next I took my 2 pieces of fabric and faced the main pattern on the inside.  I pinned the pacifier with ribbon at the top middle.

4.  Next I sewed across the top as close the the lip of the pacifier as possible so you can barely see the ribbon when finished. 
5.  Next you will sew the 2 sides and leave bottom open to pull right side out.

6.  Once you have pulled through right side out, Make sure the pacifier is in place where you want it.  Should be middle....  You will now stuff with your batting.  You want it pretty stiff.
7.  Once you have batting filled to where you want, now sew across bottom with your sewing maching and use your cutter to cut off any accessive fabric.
8.  I then used my glue gun to add the letter "A".

And there you have it!  A cute fun Beanie Pacifier.  Makes a cute Baby Gift!