Wednesday, May 23, 2012

ATTEN:  ROSETTE VINYL BRACELET TUTORIAL IS BELOW THIS TEACHER TUTORIAL!
-----------------------------------------------------------------------------------
TEACHER BRACELET TUTORIAL
TOOLS YOU WILL NEED:
1. SCRABBLE PIECES/ I ORDERED MY FROM EBAY, HOWEVER CAN BUY AT MICHAELS!
2.DRILL
3. CARD STOCK OF CHOICE
4.  THIS IS THE SITE I ORDER THE LETTER TEACHER FROM.  YOU ORDER AND THEY ARE SENT TO YOU ONLINE TO PRINT WITH IN 24 HOURS! 
5. RINGS/ BOUGHT MINE AT JOANN FABRIC
6.  CHARM BRACELET/ BOUGHT MINE AT JOANN FABRIC.
7. CRAYON CHARM BOUGHT AT CHILDREN'S PLACE
7. APPLE CHARM & BOY GIRL CHARM ORDER FROM EBAY
8.  ALSO PUT A TREE OF LIFE IMAGE ON WHICH I ORDERED FROM THE ETSY SHOP FROM ABOVE...
9. MADE WITH LOVE CHARM/ JOANN FABRIC
REMEMBER YOU CAN PUT ANY TYPE OF CHARMS YOU WANT ON HERE, DOES NOT HAVE TO BE EXACT IF YOU DO NOT WANT TO WAIT ON CHARM ORDERS!
10.  MODGE PODGE
11. DEMENTIONAL MODGE PODGE
12.  JEWELERY WIRE
13. WIRE CUTTERS
HOW TO MAKE BRACELET:
1.  DRILL HOLE IN YOUR SCRABBLE PIECES.
I DRILLED 8.  7 FOR THE TEACHER IMAGES AND ONE MORE FOR THE TREE OF LIFE IMAGE. 
2.  NEXT YOU WANT TO CUT OUT YOUR TEACHER IMAGES AND ALSO TRACE 8 SCRABBLE SIZE PIECES OF SOME TYPE OF COLORED CARDSTOCK..
3.  NEXT YOU WILL MODGE PODGE THE IMAGES ON BOTH SIDES. THE "TEACHER" WILL GO ON ONE SIDE AND THE PLAIN CARDSTOCK PIECES ON THE OTHER.   I MODGE PODGE UNDER AND ON TOP OF IMAGE. 
4.  I THEN TAKE A PIN...  AND POKE THROUGH THE IMAGES WHERE THE HOLE WAS MADE WITH DRILL...
5.  ONCE COMPLETELY DRY, I THEN USE MY DEMENTIONAL MODGE PODGE TO ONE SIDE OF ALL THE SCRABBLE IMAGES AND LET DRY OVER NIGHT AND THEN DO THE OTHER SIDE THE NEXT DAY AND LET DRY OVER NIGHT.
6.  ONCE THESE ARE DRY COMPLETELY, I TAKE MY PIN AGAIN AND POKE THROUGH HOLE TO MAKE SURE IT IS OPEN ENOUGH.
7.  NOW TAKE A SHARPIE AND ON THE BACK WHERE YOU HAVE THE SOLID CARDSTOCK PIECES WRITE A LETTER ON EACH ONE SPELLING OUT THE TEACHER'S LAST NAME...
8. NOW YOU WILL TAKE YOUR JEWELERY WIRE AND CUTTERS AND CUT A SMALL PIECE TO STILL THROUGH SCRABBLE PIECE.  BRING UP ON BOTH SIDES AND TWIST WITH WIRE CUTTER.  CUT OFF ANY ACCESSIVE PIECES. 
9.  NOW PUT A RING THROUGH YOUR TWISTED WIRE PIECE YOU JUST DID.
10.  ONCE DONE WITH ALL OF THESE YOU CAN NOW ATTACH TO YOUR CHARM BRACELET IN ANY ORDER YOU WANT.  I ALTERNATED THE CHARMS BETWEEN IMAGES.....
11.  NOW YOU HAVE A AWESOME UNIQUE TEACHER'S  GIFT!


Sunday, May 20, 2012

Rosette Vinyl Tie Bracelet Tutorial

Tools you will need:
1. Scissors
2. Chose of vinyl color
3. Chose of fabric colors
4. Hole Puncher
5. Not pictured, however sewing machine
6. Glue Gun not pictured
7. Pins..Not Pictured
Instructions:
1.  You will first cut out 2 rectangle pieces of you sizing chose from the vinyl.  Make sure exact same size.  It should be at least the width of your wrist. 
2.  Next you will put both pieces of vinyl on top of each other so they line up exact.  Then you will hole punch each side like the picture below.
3. Now you will use your sewing maching to sew up both sides so that the vinyl is visable on both sides.
4. Next you will take fabric of chose and cut out 2 strips to put through hole.  Tie in knots.  Make long enough, because this will be your tie for the bracelet.  One will go on each side.
5.  Next cut another rectangle out of fabric and you will make folds in the fabric to give it pleated look.  I did use pins to hold... however did not show under tools.  Once you have pinned how you want, then you will sew a couple times through the middle, kind of give it that fan look!
6.  Next again you will take fabric of choice and cut a strip to make a rosette.  Cut strip, tie know at the end and roll.  Use glue gun to hold it together.
7.  Now you will glue your pleated rectangle to the middle of your vinyl piece and glue your rosette on top of that in the center with glue gun.

Now you have your Rosette Vinyl Tie Bracelet!
Thanks for checking out my Blog/Tutorial!  Let me know what you think.


Friday, May 4, 2012

Teacher Appreciation "Thank You For Helping Me Grow" Necklace Tutorial


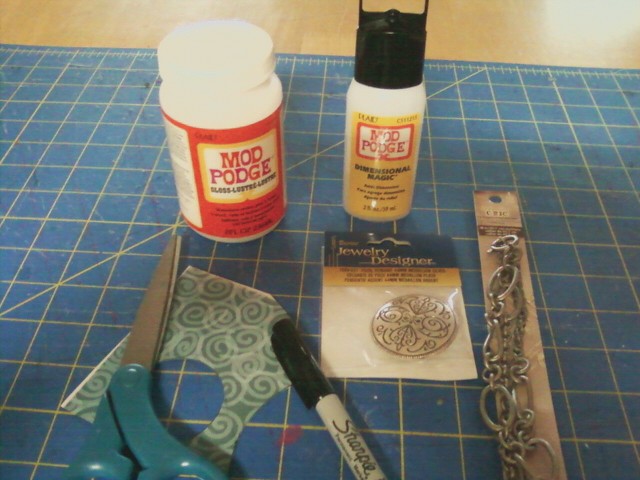
Items you will need:
-Scissors
-Choice of Cardstock Pattern paper
-Modge Podge
-Dementional Magic Modge Podge
-Small charm of choice with flat back
-E6000, Sorry not shown in my pic. of Supplies
-Round Metal Pendant.  I bought mine at Joann Fabric's in the Jewelery section on clearance for $1.97.  It is just Silver with a pattern which as you can see is covered now.
-Jump ring
-Sponge Brush, again sorry not in pic.
-Chain of choice.  Bought mine from Michaels.
-Sharpie Fine Point Marker Pen
-First I chose a pattern in my cardstock collection. 
-Then I traced my round pendant on the cardstock.
-Before cutting circle out, I used my sharpie to write my saying all the way around the circle. "Thank you for helping me grow"
-Then I cut the circle out and put a layer of modge podge onto my pendant.
-I then put my circle of cardstock on the pendant and carefully rubbed my fingers accross and around the edges.
-Next I put another layer of modge podge over the cardstock.
-Once dry I carefully start in the middle with my Dementional glaze and work my way to the outside.
-Once this is completely dry, I used the E6000 to glue my charm in the middle.
-When completely dry, I added a Jump Ring and then put on chain and then you have your awesome Teacher's Gift!!!!
Thanks for checking out my blog!  Hope you liked.  If you make one please let me know how it turned out!!!!  I am really excited for my son to give this to his teacher!!!

Another Item I will be posting a tutorial for is this Teacher Bracelet! The front is charms spelling out Teacher with each letter meaning and the back spells out the Teacher's name!  Super cute!


Saturday, April 21, 2012

Tutorial on a Button Wedding Bouquet!

Items you will need:
-Floral Wire, I bought  mine a the Dollar store (Green) and painted the stems white which I will show you later.  I used 1 & 1/2 rolls.  Just depending on how big you want.
-White pearl beads.  Bought mine from Joann Fabrics.
-Obviously various buttons of choice.  Any size and color!
-Foam Bouquet.  Bought mine from Michaels for $3.99 and used of course my 40% off coupon.
-Lace funnel that goes under bouquet.  Again bought from Michaels.  $3.99 and also used my 40% on top of that.
-Any type of ribbon or material for the handle.  You can also buy handle covers from Michaels if that makes it easy! I used Felt, Satin, Pearl beaded cover and ribbon.  Also added a locket for a picture of maybe a loved one who has passed!
-P.S.  Also added a few random tiny white floweres with stones I purchased at Michaels around the bouquet. 
So now lets get started:
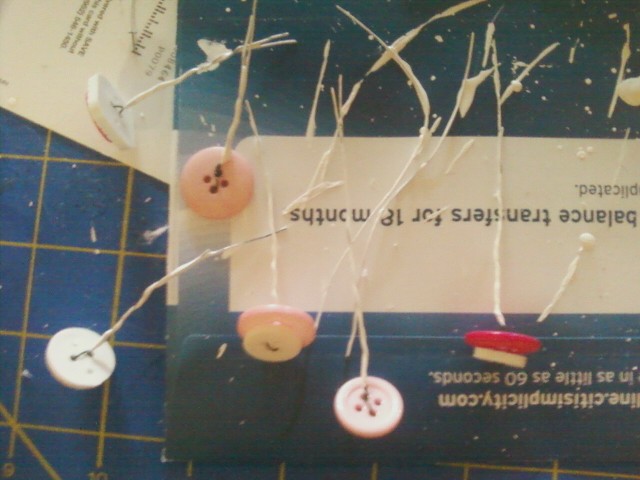
-I kind of layered the buttons How I wanted to wire them before hand.  As you can see in my button pic.
-Next you will start cutting pieces of wire about 7 inches long to thread through the buttons.  You will just go up and over and pull through.  Then Twist the stem tightly. 
-I started with about 20 & then painted the stems white & let dry.  Does not take long to dry.
-Once Dry I started in the middle of foam bouquet and you just want to stick in enough that it stays, but most of the white stem should be still out of foam.  I did not do this but some people dip the end in glue before putting into foam.  Just FYI!  The wire bends easy as you continue to put the buttons on you move the buttons and as they build it covers all the wiring.  As you almost fully build your bouquet some of your wiring will be smaller. 
-I also painted some just plain wire pieces with out buttons and would stick one end of the wire in the foam, fill half way with pearl beads & stick the other end back in the foam. Would form what I call a rainbow over the buttons.  You can see this in my final picture.  I did this in different spots througout the bouquet.
-When finished with the bouquet, you can put the funnel lace on it.  I recommend gluing it. 
-Now you can finish the handle how you like!!!!
Final Results

Thanks for visiting my blog!!!!  Hope this helps!


Friday, April 6, 2012

Random Items made end of 2011/ 2012 so far!

So I have many other things that are catergorized if you click on the months or 2011 where there are 16 different post to the right anywhere from Jewlery, Fashion Totes & Much more.  However on this new post I am just going to post random Items I have made in end of 2011 /2012.  Let me know what you think!!! You can leave comments, Question or even just email me at nomaam72@yahoo.com.  Also another really neat blog to check out is http://acreativeprincess.blogspot.com/!  Me and her have a lot of crafty ideas in common!!!

Fashion Tote with matching detachable clutch
Multi-Colored Washer Necklace

Flower Chain Ribbon Necklace

Flower Button Stretch Ring

Be Yourself Beaded Charm Bracelet. Other Charms can be added!

Button Necklace

Fashion Tote!
Multi-Pattern Wood Handle Fashion Bag!

Cute Bucket Hat with Flower!
Bucket Hat with matching Hobo Bag!
Lego Cross Necklaces with sport charms!

Team glass bead cross bracelets!


Button Boutonniere

Button Necklace

Heart Wired " I LOVE YOU" Necklace

Coach Image Necklaces

Coach Image Shoe Clips

Cuff Tie Bracelet

Dr. Seuss Book Image Bracelet

Multi-Colored Washer Necklace

Beaded Fabric Necklace


Family Tree Birthstone Charm Necklace

Washer Necklace

Button Flower Stretch Rings

Unique Wired I Love you necklace

Frog Button Boutonniere

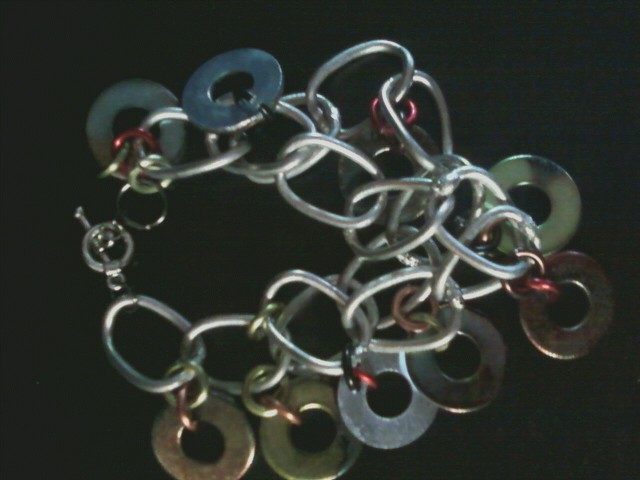
Multi-Colored Washer Bracelet

Fashion Tote


Team Stocking.  Can come in other Teams

Washer Beaded Necklace
Rosette Stocking Cap!
 Fashion Tote
 Silver Flower Mesh Bracelet
 Team Flower Coin Purse
 Wired Heart I love you Necklace
 Team Charm Bracelet
 Team Fashion Tote

Tie Ribbon Toddler Dress
 Teacher Boutonniere
 Teacher Wreath
 Team Tote
Cardinal Bags!


 Black Pendant Wired Necklace
 Volleyball Charm Bracelet
 Fabric Beaded Necklace
 Team Ornament
 Heart wired Necklace
 Multi-Colored Flower Washer Necklace
 Rug Fashion Tote!
 Teacher Wreath
Team Wreath